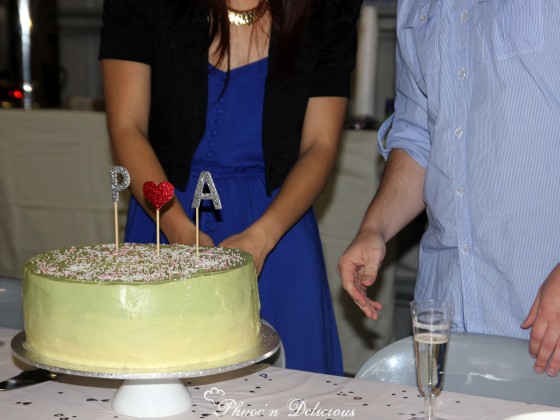
I’ve debated about whether or not I should be sharing this with you all. After all, it is very personal to me.
A few months ago, Anthony and I got engaged!
The sneaky bugger surprised me on my 25th birthday when we came back home from a lovely dinner at Restaurant Arras. I was, and still am, in shock that this has happened. We both still can’t believe that we’re actually getting married! It really does seem surreal.
Soon enough, it was time for the engagement party. We celebrated with our families and some of our closest friends.
A lot of planning went into this one night (I can’t imagine what it would be like for the actual wedding day). We had the celebration at Anthony’s parent’s place; in their massive garage/shed. I felt the need to decorate the place up, to make it feel special and personal.
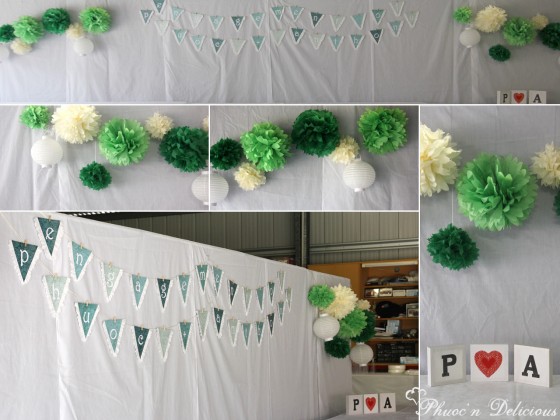
I have always enjoyed crafts and DIY (Oh how I miss you Art Attack!). I find that it’ll cost you at least half the price or less if you make things yourself compared to getting someone else to make it for you. I decided to make tissue paper pompoms as well as the engagement banner because I didn’t want to have a crappy generic banner that one would find at the shops.
There are many tutorials on how to make tissue paper pompoms (the second link is good as it provides an insight on how to puff the pompoms up nicely). Making them was a breeze; I even got Anthony to help puff them up. Normally, they would cost you about $4 each and you’d still need to puff them up yourself. I bought a selection of tissue paper from eBay which cost me $25 (includes delivery) for 100 sheets; which would’ve allowed me to make 25 pompoms. So ultimately, they cost only $1 for me to make. Booyah!
It’s pretty safe to say that my obsession with bunting arose from this moment.
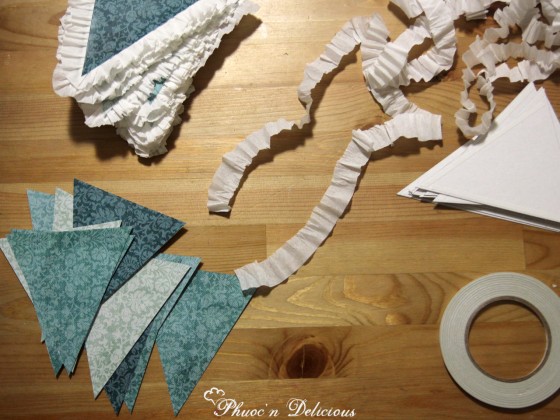
I got the idea for my engagement banner when I saw this. I had no luck finding the decorative paper that I wanted so instead, I bought a selection of digital paper from Etsy for US$1 for a pack of 12 designs and got them printed off at Officeworks. Easy peasy!
Then it was a matter of cutting cardboard triangles for the backing, ruffling and sticking crêpe paper onto the cardboard with double-sided tape (I didn’t bother to cut the crêpe paper further, like how it was done in the link, because I wanted a more ‘vintage’ look), pasting coloured triangles on top, printing, cutting and sticking letters onto the bunting triangle and using miniature pegs to hold them onto a piece of thick baking twine. And voilà! We have a beautiful and personal banner.
We had spent the majority of the morning setting up the place and it wasn’t as frantic as I had imagined it to be. There was a decent 2 hours for us to relax before the party kicked off.
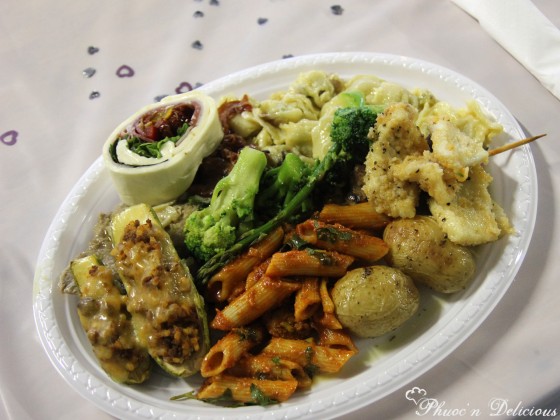
I didn’t take that many photos of the food on the night but this was my plate, packed to the brim but only covering about half of the food that was offered on the night.
Good food was a priority for our night. As one of Anthony’s aunts is sensitive to gluten, we needed to find a catering company that would be able to cater for her dietary requirement as well as be close to home. I found Fondue Lava by chance and was a little worried at first because there was no reviews on them and no one we knew had used them before. But I’m glad that I took the risk. Dealing with Antonio and Carmelina was a pure pleasure; they took the time to assist me throughout the entire process and provided exceptional service. They understood the pressure to perform, seeing as most of the guest were Italians!
On the menu were bruschetta, stuffed zucchini, boccocini roulade, pork sausage rigatoni, tortellini bosciola, chicken and capsicum skewers, pancetta wrapped veal, fried calamari, 2 salads and 2 vegetable dishes. The food was generous and outstanding; everyone raved on about the food, even Anthony’s nonna loved the rigatoni, that must be saying something no? For me, that rigatoni pasta was great but the one item that possibly blew everything out of the water was the boccocini roulade. A flat sheet of boccocini is filled with cured meats, antipasto and some salad leaves, rolled up and cut into slices. It was so fresh and light, I’d eat it like a kebab if it was provided to me uncut. Definitely a must-try.
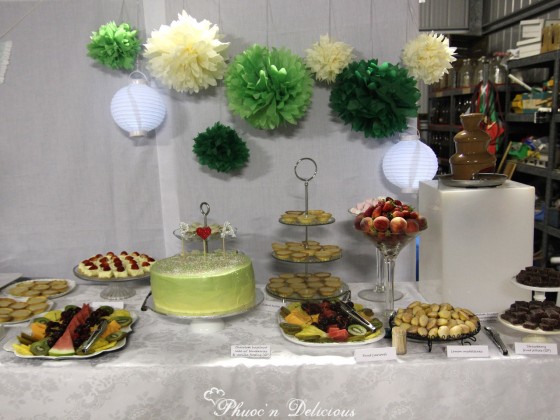
With a bit of a break, we moved onto the cutting off the cake and desserts.
I had always wanted a dessert table for my engagement party and was adamant to tackle making a selection of desserts for it. The fortnight leading up to the party involved testing recipes and plenty of baking. If you follow me on instagram, you would’ve seen my 2 week baking plan. In fact, I had made 2 other plans following that; one for the week leading up to the party and then another for the day before! We needed to consider gluten-free options for dessert, but especially the engagement cake.
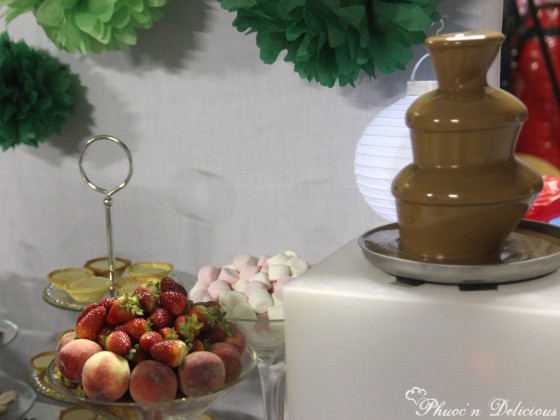
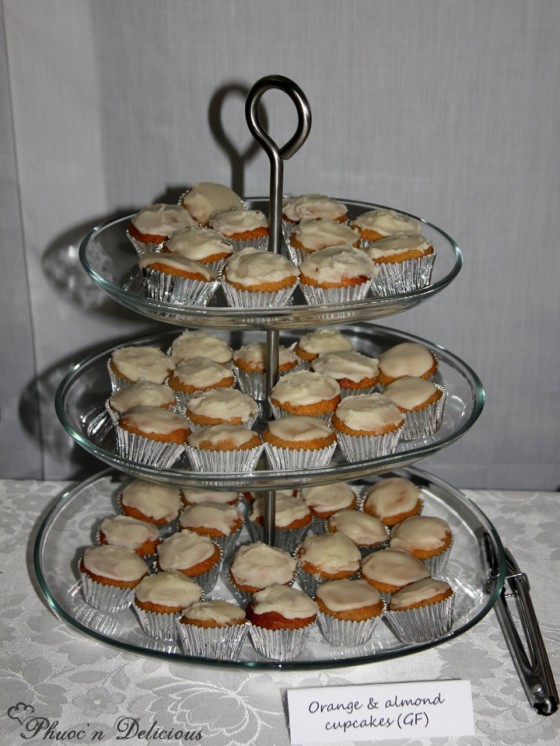
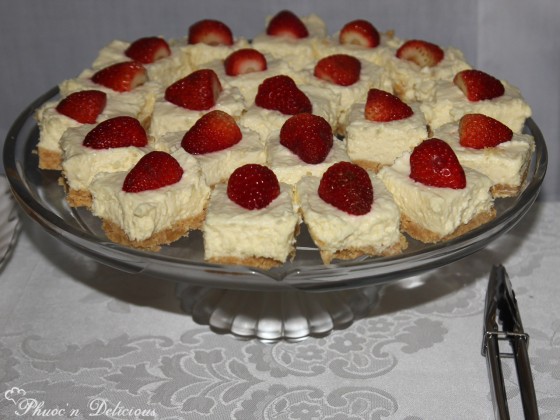
I had Anthony’s mum assisting in making two of the desserts; orange and almond cupcakes and cheesecake. Whilst I made the engagement cake, strawberry pate de fruits, lemon-glazed madeleines and custard tartlets. A chocolate fondue with strawberries and marshmallows was provided to us, free of charge, by Fondue Lava as we had catering with them. There was also fruit to be had for those who don’t have a big sweet tooth.
All the little drama that came up along the way made things interesting… Not! Baking a gluten-free cake was not the issue. I made a flourless chocolate and hazelnut cake. The issue arose mainly from the decorative aspect for the cake. I had to be super careful to make sure every ingredient, from the hazelnut meal to the chocolate, was gluten-free. I mean they should be BUT they may be processed with equipment that processes wheat products such as chocolate, sprinkles and food colouring.
Now let’s focus on the last two there, now who would’ve thought?! I tend to use Americolor food colouring gels, which are gluten-free but on this occasion I had purchased a Wilton food colouring gel because I liked the colour of it without realising that it may contain traces of gluten. Argh! That had set me back a day of decorating the cake, forcing me to buy the proper food colouring gel and ice the cake on the day. I managed to find some gluten-free sprinkles which was a relief!
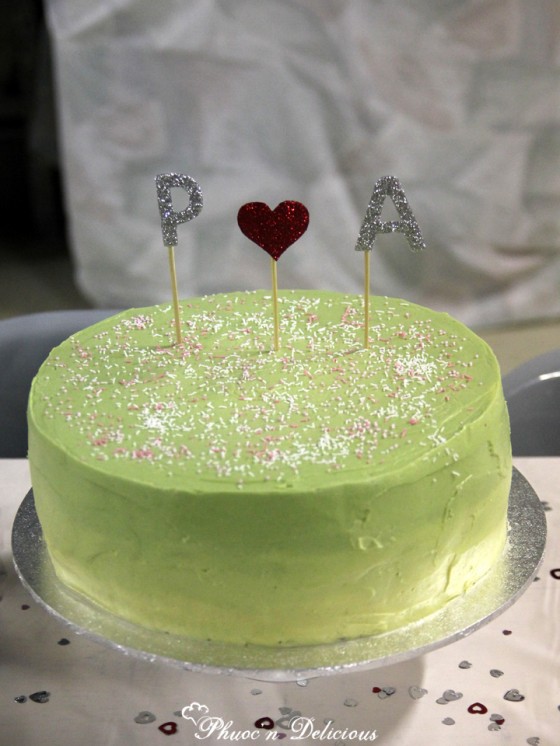
Three 12-inch layers of chocolate and hazelnut cake filled with vanilla buttercream and fresh blueberries wedged between the layers made up this monster; which served 40+ guest generously. I should have stuck with making 2 layers though but hey, better more than not enough I’d say.
Oh! And I made those little cake toppers too! It was too late for me to get cheap toppers from eBay so I simply made some with cardboard, super glue, skewers and plenty of glitter glue.
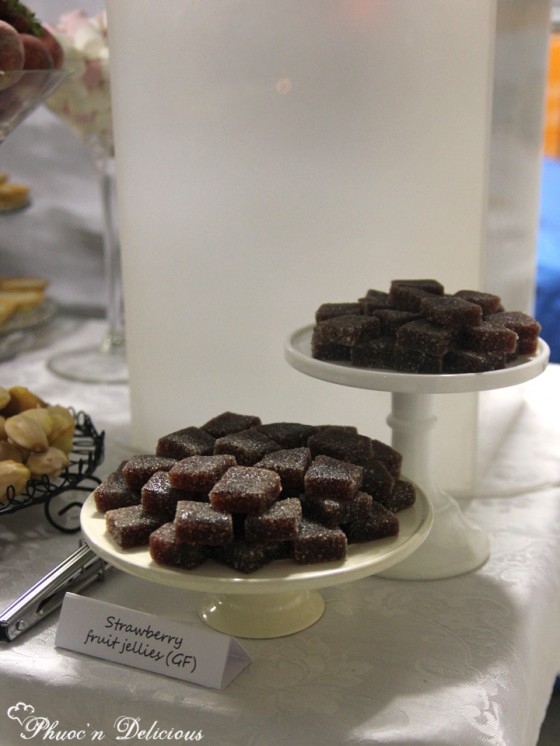
Pate de fruits; otherwise known as fruit jellies, were also to be featured as I love making them. I made them for the first time for the Halloween Dessert Degustation Dinner hosted by Billy, Karen and I a few weeks back (I’ve yet to blog about my experience but will do so eventually). For the trial run, I made them with fresh fruit but for the event I made them with frozen fruit purée. I won’t be doing that again, the frozen purée changed the texture of the pate de fruit, from smooth gummy-like to grainy.
All that is required to make pate de fruit is fruit, sugar and lemon juice. It sounds simple but there is a bit of science behind it all. Most fruits contain pectin, a natural setting agent. Some fruits have more pectin than others, but generally citrus fruits and berries tend to have the most. Therefore you don’t need to add extra pectin to make these fruits set, the addition of the lemon juice is enough.
I used this recipe to make pate de fruit without pectin. All that is involved is that you cook down your fruit with a bit of lemon juice and water, purée the fruit and weigh it, then you add the same amount of sugar to the purée and cook it over medium heat until the mixture thickens to the consistency of jam.
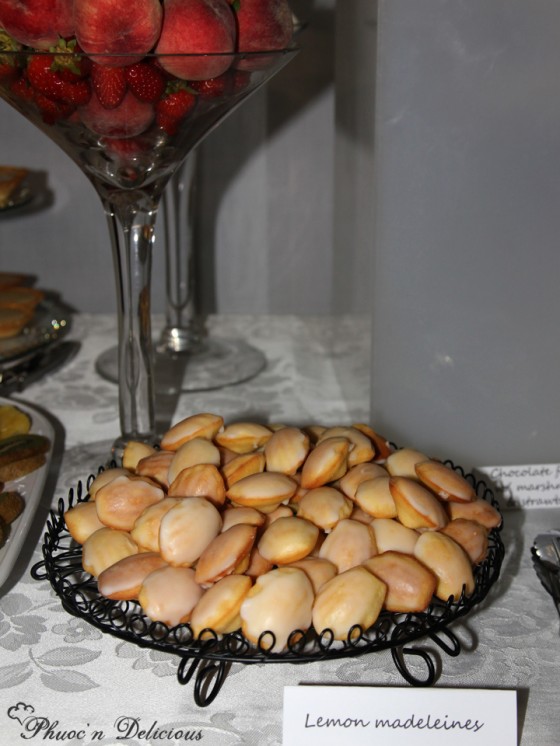
Bite sized treats was the goal for the dessert table. I managed to find mini madeleine baking trays and eagerly wanted to make these. The recipe I used was from David Lebovitz. No issues were had with this dessert; it was straight forward. Make your batter, chill and bake! Simple. Why couldn’t everything be this easy? But because of their small size, they were extremely addictive and I couldn’t resist popping a few in my mouth as I made them.
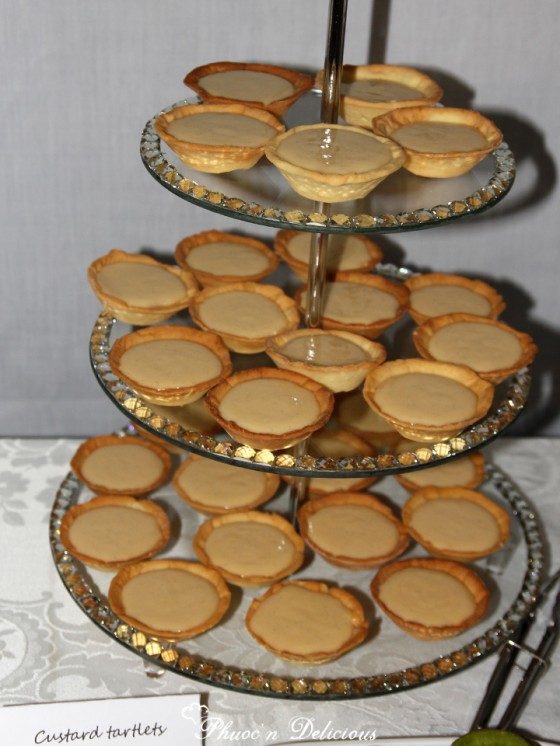
The last and final dessert offered included tartlets filled with a vanilla bean crème patisserie. The recipes for pate sucree and crème patisserie were from the cookbook Pastry by Michel Roux. As both components could be made in advanced, this was the main reason why these tartlets were made.
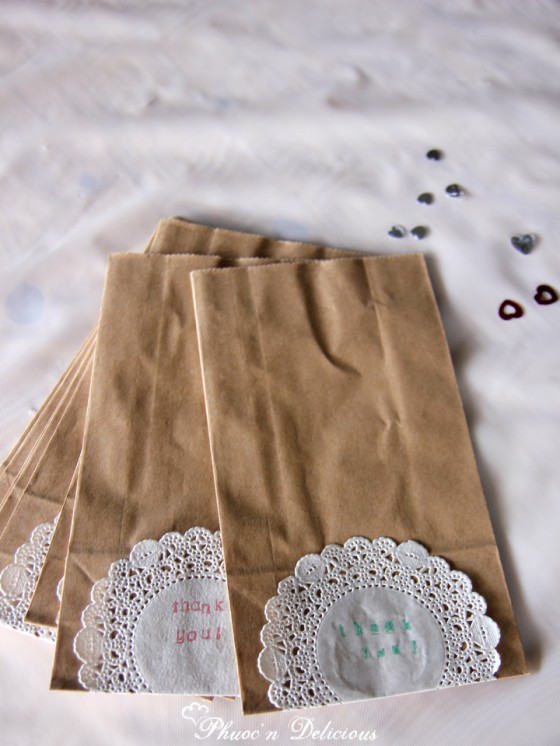
And in case our guest couldn’t finish off the desserts, I had made favour bags for them to pack with desserts to take home. As you can see, it’s as simple as sticking a doily onto a kraft paper bag and stamping “Thank You!” onto them.
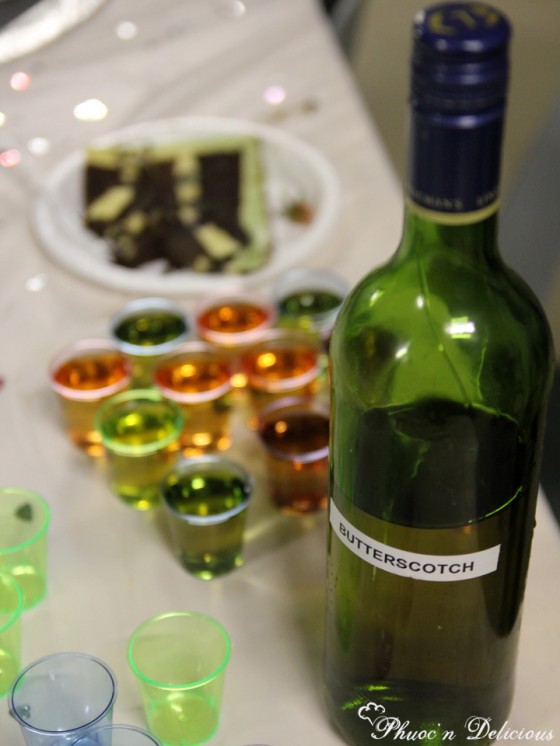
Our night was drawing to an end and it was only appropriate to finish off the night with a few shots of homemade butterscotch schnapps provided by a friend of Anthony’s brother. It smelt extremely potent at first but went down so smoothly. A little too smoothly.
What a night that was! Everything turned out so well and it seemed like everyone was enjoying their time at our party. We couldn’t ask for more.
It’ll be fun and interesting times ahead that’s for sure. How I’ll manage to plan for a wedding and complete my PhD will be a challenge, but I’m lucky that I have plenty of people to help out along the way. We have a general direction of how we want our wedding to pan out, so I can’t wait. I’m so looking forward to the suckling pig that Anthony would have to bring over when he comes to pick me up.

Congratulations! Such wonderful news and thank you for sharing! The food and decorations look amazing 🙂
Congrats again Phuoc! You did a great job!! 🙂
CONGRATULATIONS PHUOC!! You kept this secret discreet very well haha I am so happy for you and Anthony! (I didn’t even notice a ring on your finger yesterday :p). Sounds like you had a great engagement party and well done for creating all the decorations yourself and baking so much. Everything does look like a treat. Again, congratulations and the wedding planning is only going to be fun! I do love weddings lol xx
Congratulations Phuoc! You did an awesome job with all those DIY decorations – everything looks so beautiful. And so kind of you to go to so much trouble to get gluten free things for that one person – I’m sure she appreciated it!
Ah that’s lovely! Congrats! I do hope you’re not going to do all the baking for the wedding day though…?!
Phuoc! This looks fantastic!! Love the DIY decorations! Definitely adds personal charm to the party 🙂
Congratulations Phuoc!!! So exciting and what an awesome dessert table! Love love love the DIY decorations too, thanks for linking to the pom Pom tutorial, I really want to learn how to make those!
awww this so a sweet post. Congrats Phoc!!! I loved how much effort you put into the decorations (not just the food) esp with the poms poms! Wedding planning is going to be heaps fun. I can’t wait to see what DIY plans you have installed for then!! 🙂
What a gorgeous collection of sweets – loving your theming too. Congrats again!
Congrats again, guys! And LOL, thinking about the suckling pig already?
Congrats! Can’t believe you kept it a secret for so long 🙂 After this I can’t wait to see what you do for the wedding!
Congrats to you and Ant again xoxo What an amazing job you did with all the decorations, looked amazing. Everything looked amazing. On a side note, I miss Art Attack too!
Congrats phuoc! Amazing spread of desserts!
Congrats Phuoc!!! 🙂 And the food and decor looks amazing as usual 🙂
squeeeeeeeeee congrats again!!!
Once again, congrats! The food and decorations look awesome!
Love all the DIY stuff – and omg I remember loving glitter glue as a kid! Congrats again 🙂
Everything from the food to the decorations looks beautiful! Congratulations again Phuoc – I am so glad you posted this 🙂
Thanks everyone for your wishes!
Liv: Nah… I don’t think I’ll be doing any baking for the wedding, I already have someone in mind to do my cake. So all good!
Steph: Not a problem! They are so easy to make and definitely make an ordinary room stand out. Have fun!
Food is our religion: Oh yes! I have a few more DIY ideas up my sleeves 🙂
Tina (food booze shoes): Could you believe that Anthony kinda suggested the colour scheme?
Rita: Of course! Isn’t that what we all should look forward to? Mmmmm…
Sara: I know hey!? I miss the Art Attack days.. I can’t remember making too many things from the show but I loved watching it.
Congrats to the both of you – your party looks lovely and your decorations are very sweet.
Awww so sweet congrats to you both 🙂 hehe art attack brings back memories nawww
Congrats Phouc 🙂 I love all your DIY decorations. I love etsy, I can spend hours on there looking at stuff.
Thanks ladies!
Ai-Ling: I totally agree! Gotta love Etsy
OMG congratulations 😀 YAY!!!!!!!! xoxox
Congratulations!!! yeah!!
I’ll do what I did when I saw you at the foodbloggers Christmas party last weekend: AAAAAHHHHH!!!!! So excited for you two… and well done to your man for that lovely ring!
Thanks guys! 🙂
Trisha: HAHA *jumps up and down with you* Thanks! That’ll secure him brownie points for a long time!
Congratulations! How exciting for you and what a fab job you did with the engagement party.
Love the whole setup!
Because I’m always tragically late with everything, belated congratulations on getting engaged!
Oh man CONGRATULATIONS!!!!! That’s such amazing news. :’)
Wow Phuoc!! Congrats to you both! How exciting 😀 I’m so impressed by both this amazing engagement spread, and how well you can keep a secret 😛
Thanks ladies! I’m so excited 🙂
HUGE congrats to you and Anthony! Your dessert table looked amazing. Hope you have a great year planning your wedding =)
Linda: Thanks! It definitely will be a crazy but exiting time ahead. Can’t wait!
m5dobm
4snt9x
I love reading through an article that will make people think.
Also, thank you for allowing for me to comment.
fftrlk
b0zxad
a71na5
uu8o5g
453lfi
2cuzz2
rx6097
44y6l6